Lake sediment cores aren’t as easy to photograph as one might expect. They often have a thin surface layer of water, which reflects any nearby light sources, and while the core sediment itself may be reasonably flat, the table, measuring tape, etc will rarely be at exactly the same level relative to the camera.
The presence of a reflective layer can make interpretation of core photography difficult, as the reflections can obscure the actual texture and colour of the sediments.
The differing heights of features relative to the camera causes problems through topographic (or relief) displacement. What this means is that taller (closer to the camera) objects near the edge of the frame appear to be displaced outwards from the centre, while shorter objects appear to be displaced inwards. This presents a challenge for aligning and combining photos, as features on the edges of the photos are shifted inwards or outwards due to their differing heights. One option to minimise this effect is to take the photos with a very long focal length. However, space is often limited and alternative techniques may be more effective.
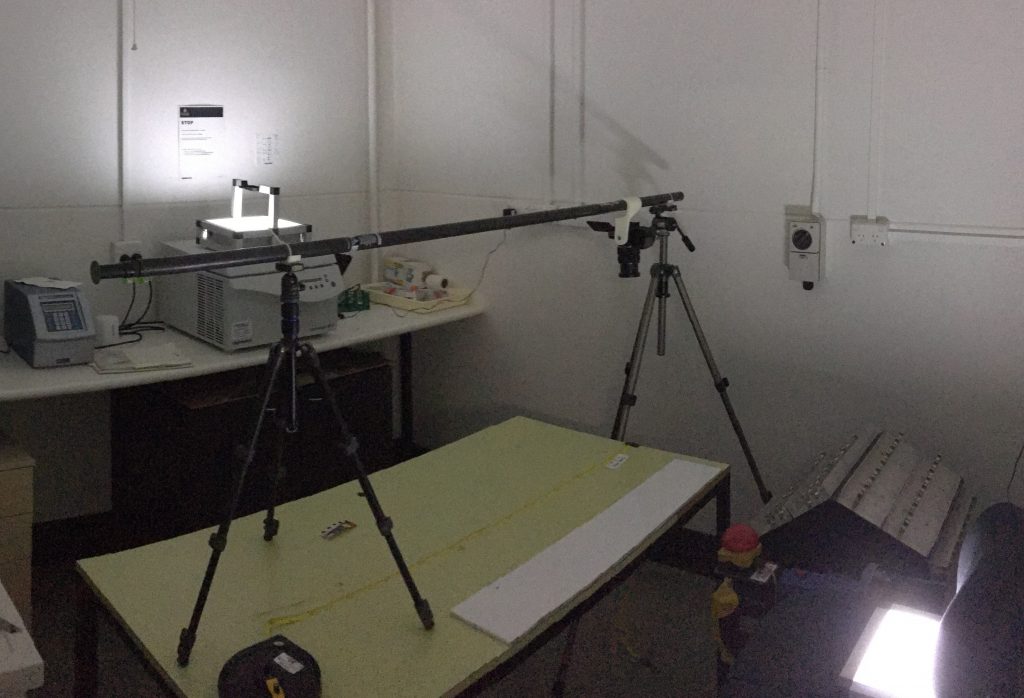
Recently I had the opportunity to photograph a pair of cores from Lake Surprise, each consisting of ten 1 m core segments. This post documents a few techniques used to minimise the problems described above.
To speed up the process, and to ensure a high degree of consistency across all the photos, the camera was hung from a boom suspended between two tripods, using a few small 3D printed parts. The camera was set in manual mode, and the focal length wasn’t changed between shots. A significant amount of overlap (~60%) was used between adjacent photos.

To avoid reflections from the moisture on the sediment surface, the photography was done in a dark room with white walls, illuminated using a pair of LED light sources. These lights were pointed upwards and bounced off the ceiling, giving a very flat, diffuse light.
After the photography was completed, an initial assessment of a simple 2D alignment showed that the relief displacement was significant both for the tape measure, which sat a few centimetres lower than the core, and for the core itself, as the core wasn’t particularly flat, and the core surface often wasn’t perfectly perpendicular with the camera.
Therefore, rather than aligning the photos in a 2D package like Photoshop, the photos were aligned in Agisoft Metashape, a program designed for photogrammetric reconstruction. From the aligned photos, a 3D reconstruction of each core segment, and the surrounding table, tape measure, etc was derived. Then, ortho-mosaics for each core segment were generated (essentially reprojecting each image onto the 3D model).
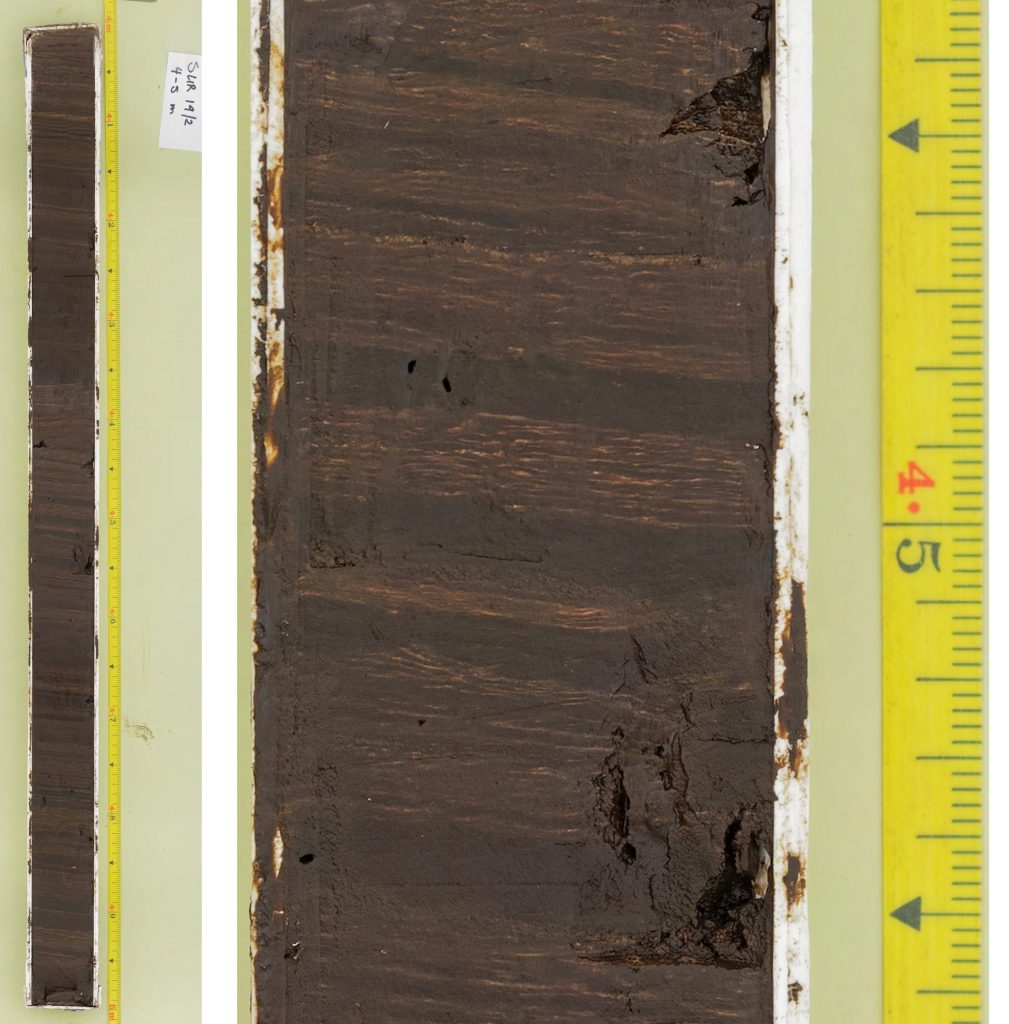
The end result is series of high resolution ortho-mosaic images covering the entire length of each sediment core, with no distortion or ambiguity at the seams between photos. Per pixel resolution is around 0.05 mm, with ~20000 pixels along each core. This facilitates the merging of all the core segments into a single core photo. Applying this methodology requires a degree of care with photos, particularly with regard to overlap amounts, and some significant computational time. However, the results are very, very satisfying.